We will tell you in step-by-step instructions how to create the first project
Unity is a powerful engine for creating games and visual applications. It is widely used in the gaming industry, as well as in other industries such as architecture, medicine, education, and many others. In this article, we'll look at the basic steps required to create a Unity game.
Step 1: Downloading and installing Unity

The first step is to download and install Unity on your computer. You can download Unity from the official website https://unity.com/ru.
Once downloaded and installed, you can launch Unity and start working on your game.
Step 2: Customizing the interface
To create a Unity game interface, you can use ready-made elements or create them yourself. Place the interface elements on the screen and adjust their properties, such as size, color, and position. Add functionality to interface elements such as buttons and input fields.
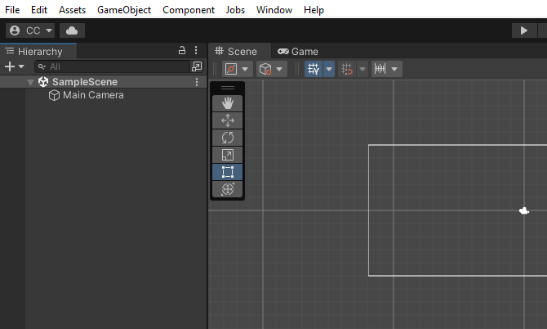
The environment interface itself consists of the following workspace elements:
The upper horizontal toolbar consists of standard File, Edit, and Help tabs, as well as specialized Assets, GameObject, Components, and Window tabs.
We also have the following elements:
Scene — stage window,
Games — game window,
Hierarchy — a window with a list of all objects in the Scene window,
Project — our project itself,
Inspector — window for changing object characteristics.
Step 3: Setting up triggers
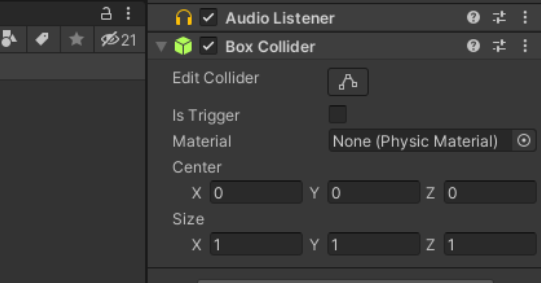
Triggers are objects on the scene that will trigger specific events when interacting with objects. To set up triggers in Unity, add them to the scene and adjust settings such as range and type of interaction. Add scripts that will be called when triggers are triggered to implement the desired behavior of objects and interface elements.
Step 4: Creating a new project
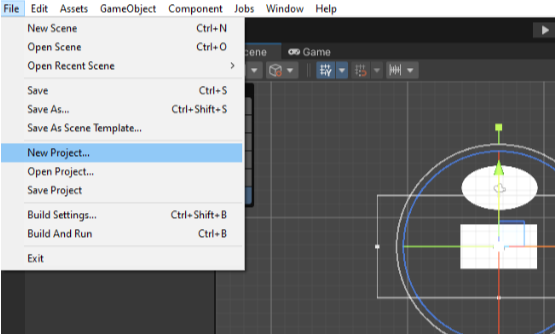
Once Unity is launched, you'll see a window where you can create a new project. Click the “New project” button and choose a project template that meets your needs. You can also customize project settings, such as project name, location, etc.
Step 5: Creating game objects

Once you've created a new project, you can start creating game objects that will be used in your game. To create game objects, you need to select the GameObject tab in the top panel and select the type of game object you want to create. For example, you can create an “Image” game object to use as a simple element in your game.
Step 6: Creating a scene

The stage is where your game will take place. To create a new scene, select the “File” tab in the top panel and select “New Scene”. You can then add game objects to your scene and start working on their placement and interaction.
Step 7: Working with components
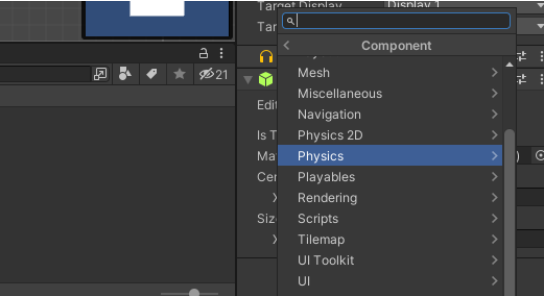
Components are special modules that are added to game objects and allow them to perform various functions. For example, the Physics component allows a game object to have physical properties, such as obstruction and tangibility. To add a component to a game object, select it from the object hierarchy, then go to the “Add Component” tab in the Inspector window and select the component you want.
Step 8: Setting up game logic
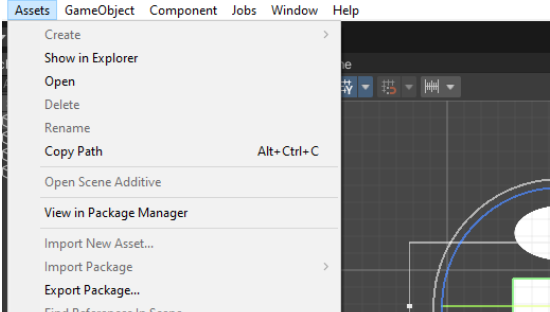
Once you've created game objects and added the necessary components to them, you can start working on game logic. Unity provides the ability to create scripts in the C# programming language that can control the behavior of game objects and the interaction between them.
To create a new script, select the “Assets” tab in the project panel and select “Create -> C# Script”. Then drag the created script to the desired game object to link it to it.
Once you've created your script, you can start writing code that controls how game objects behave. For example, you can create a script that moves a game object when a key is pressed, or a script that will determine what happens when two objects collide.
Step 9: Working with sound and graphics

Unity also provides the ability to work with sound and graphics. You can add sound effects and music to your game, and create beautiful graphics using Unity's UI editor.
To add a sound effect to your game, select the Assets tab in the project panel and select Import New Asset. Then select an audio file and add it to the project. You can use the same approach to add music.
To work with graphics, you can use Unity's built-in interface editor, which allows you to create beautiful interface elements such as buttons, text boxes, and more.
Step 10: Testing and optimization
Once you've finished working on your game, you need to test it to make sure it works correctly and without bugs. Unity provides the ability to run the game in development mode so you can test it on your own computer.
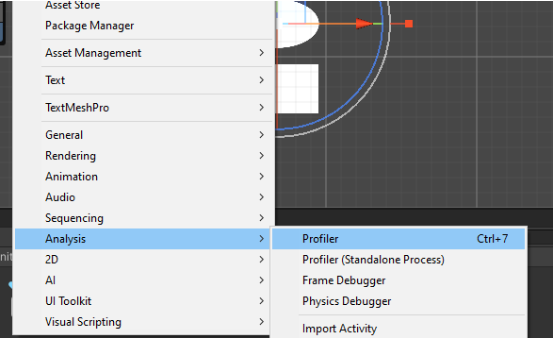
During the testing process, you may find bugs and shortcomings in the game that need to be fixed. One tool that can help you do this is Unity Profiler, which allows you to analyze your game's performance and identify possible issues.
After testing the game, you'll need to optimize it for smoother performance and improved performance. For example, you can use fewer resources to display graphics or reduce the number of objects on the scene.
Step 11: Publish a game
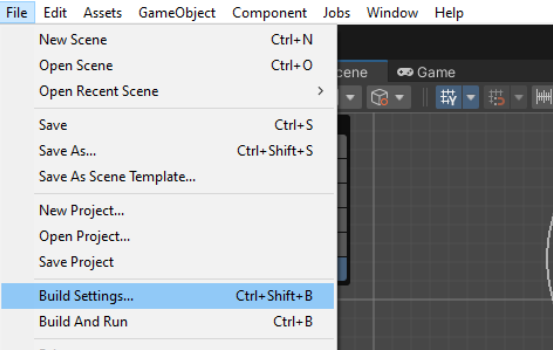
Once you've finished working on the game, you can publish it. Unity lets you export your game to multiple platforms, such as Windows, Mac, iOS, Android, Xbox, and more.
To export the game, select the “File” tab in the top panel and select “Build Settings”. Then select the platform you want and click the “Build” button. Unity exports your game to the right format for your chosen platform.
Once you export your game, you can publish it to a platform like Steam, Google Play, the App Store, or Xbox Live. To publish a game, you'll need to create an account on your chosen platform and follow the instructions that will be provided.
In conclusion
Unity is a powerful game creation tool that allows you to implement almost any game idea. By following the steps above, you'll be able to create your own Unity game and publish it on your chosen platform. Good luck creating your first game! And if you want not only to learn the basics of Unity, but also to become a master of this development tool, we recommend that you sign up for a trial lesson on Unity at our programming school for children Progkids.
A trial lesson is free with a teacher; it will help you understand how interested your child is in this field.
In addition, the student will plunge into the world of development, which is undoubtedly very promising and will help your child reach unprecedented heights in the future!